Yesterday afternoon, a pipe in the wall of our basement workshop sprang a leak. Fortunately, The Husband heard it, as the stream of water was spewing from the pipe onto the basement floor. Please forgive me for beginning the photos of this adventure somewhere in the middle ... we were too busy scurrying around and sopping up water to fully document the beginning of this story.
Here is the offending pipe. When this process started, the pipe was buried underneath a layer of plaster and metal lath. We had to demo all of this to get to the pipe. (After we shut off the water to the house to help stem the spewing.)
The arrow marks the hole in the pipe.
The hole was caused by a stupid mistake made by a plumber 40 years ago. He must have run out of copper pipe brackets (the ones used to secure the pipe to the wall) and he used one made out of another metal in this spot. Since that time, the dissimilar metals have been cooking some sort of chemistry experiment in this spot, wearing away the copper until a hole formed. If this hadn't been really thick old-school copper pipe, the hole probably would have taken a lot less than 40 years to develop. Look at how the bracket is all corroded and barely recognizable.
Anyway, we had demo work to do to expose this pipe. There were three layers of plaster on this wall. The first two layers, the original lime plaster over the brick walls and another layer of plaster installed when the kitchen was brought into the house and plumbing was installed in the 1930s or 40s, weren't a problem. The topmost layer of plaster, and two layers of wire lath installed when the house was remodeled in the 1960s, embedded the pipes into the wall and made it very difficult to access the pipe.
We had already removed the plaster on the wall below the level of the pipes last year when we took out the remnants of the basement kitchen to convert the room into a workshop. What was left at that time was the difficult part of the job, removing the plaster around the pipes, so we decided to do it another time. (To see photos of what the room looked like at that point, click HERE.)
Hopefully, this little diagram helps you understand what I'm talking about.
In order to expose the pipe, it took me about two hours with a hammer and a flat bar, chipping and prying plaster and wire lath off the top of the wall and the edge of the ceiling. It took me so long, because I had to work very carefully around all of the other pipes. After I finished, the floor looked like this.
Towels to sop up the puddle, a bucket to catch the spewing, and lots of plaster debris.
With the pipe right against the brick wall like it is, we couldn't use a regular tubing cutter to cut the pipe. Couldn't use a reciprocating saw either, because the other pipes are too close to the one we needed to cut. Sometimes when working on an old house, it's important to think outside the box ... so The Husband cut the pipe with our trusty Dremel tool.
I'm standing below, spot-lighting the area so he can see what he's doing.
We had to cut out a seven-foot section of the pipe, because there was one other spot on it that looked a bit questionable.
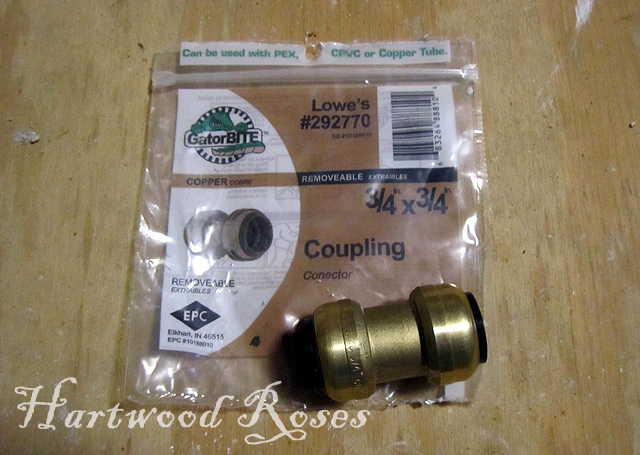
It would have been really difficult to do a traditional fix on this pipe (sweating on copper coupler fittings), because the pipe is right against the brick wall. This is where technology came to our rescue, in the form of the most wonderful press-in-place fittings, called 'sharks'.
We cut the new piece of pipe to fit, and used a 'shark' on each end to patch it into place.
Left side.
Right side.
And now we have nice new run of bright, shiny, and hole-free water pipe!!
All that was left for us to do was to turn the water back on, pray our fittings didn't leak (they didn't!!), and sweep up the mess.
I checked numerous times during the day today, and The Husband did too, and everything has remained completely dry.


