To help you get your bearings with this, I'm going to start with a bunch of older photos that show where things started and bring you up to speed on the work that I did to finish this project last week. Here are some Before photos, taken with an ancient Epson digital camera, during our first tour of the house before we bought the place in 2002. Everything looks way better in the photos than it did in person.
View as soon as you come in the front door, looking upstairs from the foyer. (July 2002)
Basement door. (July 2002)
Side view, showing the plain square balusters, curvy stair trim and paneling with moldings. (July 2002)
Upstairs landing. (July 2002)
This photo gives you a good view of the staircase as it winds around the center of the the original 1848 portion of the house. There is a small set of three steps not shown, behind this view leading to the addition.
2009?
All of the woodwork in this house, except the handrail and newel posts on the staircase, are made from heart pine and it has always been painted. Previous owners added more paint, lots more paint ... most of which was applied hastily and without adequate cleaning or preparation. A lot of my renovation effort in the early years was spent with a heat gun in one hand, and a scraping tool in the other, as I worked to remove the paint and reveal the original contours of the moldings.
Stripping paint, carefully removing moldings as I worked, with a large pile of paint curls swept into a pile. (January 2006)
Slow and steady progress. (January 2006)
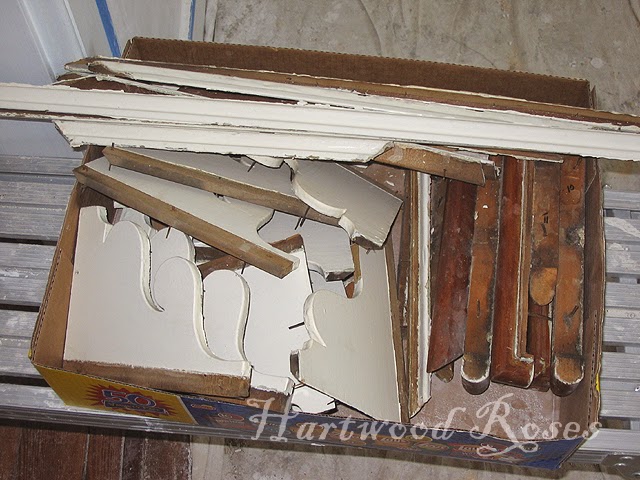
Box of parts ... panel moldings, curvy stair trim, and stair tread return moldings. (January 1006)
Before and After view of moldings that I removed from the stair paneling, stripped, scraped, and lightly sanded. (February 2006)
I used drywall knives to protect the original finish on the newel posts from the heat gun and scraping. You can tell that this was a long time ago ... Look at my cell phone there on the step. (February 2006)
Only two little bits of trim and some risers left to strip at this point. (April 2006)
View from the other direction. You can see that I had stripped the front door, trim, transom, and sidelights already. (April 2006)
In 2007, I removed half of the balusters from the staircase to make it easier for the floor refinishers to work on the stairs ... and to gain better access to the remaining balusters so I could strip and sand them. I had to be very careful as I worked, because it was important to me to preserve the original finish on the handrail.
Balusters removed, and half of the ones in this photo are stripped of paint. (April 2006)
See how I had stripped the lower portion of the balusters, and the upper part (where I had to be so careful next to the handrail) wasn't stripped yet. (April 2006)
The balusters that I removed were stripped, sanded, and added to the box of parts. (April 2006)
This is what was underneath the handrail ... sloppy paint from previous paint jobs in three colors: beige, green, and white. Grrrrr. (photo from April 2006) I carefully scraped off as much of the paint as I could, then touched up the wood using various colors of brown acrylic craft paint to make the damage disappear.
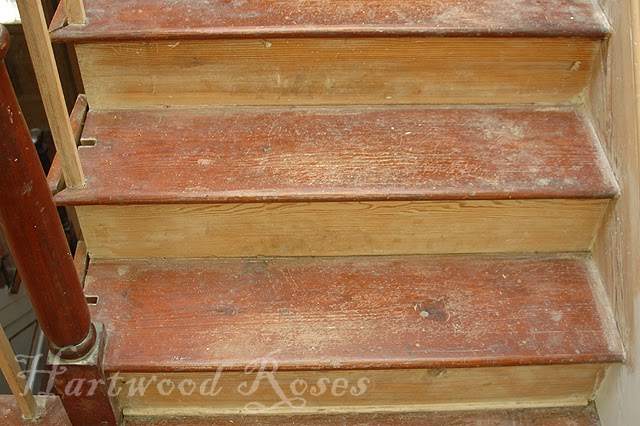
Risers on this upper run of stairs are stripped and sanded, balusters are removed for safe keeping, ready to have the treads refinished. (February 2007)
As I disassembled things, I marveled at the craftsmanship! Each baluster was held into the stair tread with a half dovetail joint, no fasteners or glue ...
... and was attached to the handrail at the top with two tiny square cut nails. These two nails broke off during removal, and the part you see is what I removed from the baluster.
This is an in-process photo of the floor refinishing, and it shows that the paneling on the stairs was sanded and primed. (February 2007)
Finished floors, and a front view of the staircase as it was at the time. (March 2007)
Risers are painted, and the skirt board is primed and ready for finish paint. (May 2007)
Even though the staircase was still mostly disassembled, the messiest of the work was finished and we ordered and installed the new carpet runner ... Karastan's 'Samovar' pattern. This is how the sample piece looked on the stairs. (May 2007)
This brings us up to the present, when I picked this project back up last week. My goal was to finish and reassemble the railing itself ... the paneling and other parts of the staircase will wait for another time.
In the basement, I taped off the dovetails on the loose balusters and laid them out to be primed and painted. Notice how each of them is a different length, having been custom fit into place when the stairs were constructed. Thank goodness I had the presence of mind to number them when I took them out.
Primed and painted!
The stair tread return moldings had globs of varnish drips underneath of them from a sloppy refinisher. I scraped this off ... you can see Before and After improvement. Notice that I was careful to leave the original square cut nails in place.
Stair returns ... all ready to be reinstalled.
On the staircase itself, I carefully taped off the balusters, top and bottom.
This shows the balusters on the center landing, at the halfway portion of priming that section.
One coat of primer, two coats of finish paint ... Farrow and Ball's 'Wimborne White'.
It was a challenge to paint in such close quarters and to make sure that I didn't accidentally leave a drip or a run that would spoil the finished product.
Dorothy and Alice were usually around to inspect my handiwork.
Dorothy, again, on a different day.
It took DAYS to get all of the balusters primed and painted, and the return moldings scraped and repaired. I was so happy to finally get started putting the pieces back into place!
Ready to put the missing baluster back into place.
Balusters slip right in, without any fasteners or glue. This photo also shows a pencil notation (that I can't make out) that was made by someone during the staircase's original construction.
I realigned the nails into their original holes, and carefully tapped the stair tread returns back into place.
I'm not going to try to disguise or fill the original nail holes on the returns ... they are what they are.
All that was left to do was to break out my compressor and brad nailer and to pin the tops of the balusters in place underneath the handrail. See the rug by the basement stairs (at the top left of the photo)? It's the original carpet sample from the stair runner ... perfect size for that spot.
Winnie and Ruby stuck close by one another while I was using the nailer.
That's it ... all finished (with this part of the stairs, at least)
A pretty picture of the final result. From this angle, the stairs almost look finished.
There's still lots to do (curvy stair molding and the paneling and painting) ... but I will wait till after the first of the year to get back to it.
You may be asking, why did it take almost a whole week to do what seems like a minor portion of this project? Painting and reassembling a handrail is only a good afternoon's worth of work, right? Not! I'm very deliberate when I work, and I insist that I do my very best, which slows things down. Every bit of paint is applied precisely, with nothing slopped where it shouldn't be and no runs or drips. I wish I had counted how many times I went up and down the stairs, round and round each baluster, as I carefully applied the paint and feathered out the edges while I worked, one coat of primer or paint per day, lightly sanding between coats. (There's also the matter of daily household stuff that still needs to be done, more on some days than others.)
Folks tell me from time to time that I should have my own TV show, demonstrating old house renovation. Based on how careful I am when I work, and the quality of the finished product that I demand of myself, and how long it can take me to achieve this, I can't imagine anyone but me being interested in watching that ... you figure, I just condensed nine elapsed years into one blog post. (Having watched the Rehab Addict slop paint onto dirty siding on the back porch of her Dollar House, I realize that quality work isn't necessarily a requirement for having one's own home improvement show.)
Now that our stair railing all finished, it's time for me to break out the decorations and add some Christmas to this place ... gonna do that while I watch football this afternoon.
Happy Sunday, Everyone!
P.S. Click HERE if you want to see an overall tour of our entire foyer, from a blog post in 2010.
P.S. Click HERE if you want to see an overall tour of our entire foyer, from a blog post in 2010.


