Thursday, March 27, 2014

How to Paint a Compass Rose

Let's get right to it, and I will take you step-by-step through the process of how I painted the compass rose onto this tabletop.


I came up with the pattern by just fiddling with it.  The center portion of this table is 26 inches in diameter, and the compass rose is 22 inches from point to point.  (not counting the extended part of the outline on the points.) To make the pattern, I taped together some scrap paper, folded it into quarters, and played around with my ruler and a pencil until I liked what I had.  I wanted the sections of the pattern to be long and graceful, without being skinny and hard to paint.  I did a lot of erasing before I came up with the final pattern, which looks like this:


I use graphite transfer paper to get the pattern onto the tabletop.  You can buy it at any craft store.  (The kind that I have is HERE.  I think I got it at Michael's.)  Tape the pattern into position, slide the graphite paper underneath, use the yardstick and a ballpoint pen to trace the pattern onto the table.

Alice and Maggie are helping.


With a pencil, I put a small mark in every other area of the pattern to keep from getting confused as I tape off the pattern.


Speaking of tape, I use plain old Scotch transparent tape when I paint designs onto furniture.  There are all sorts of more expensive options, but I have found that Scotch tape works the best.  I get crisp lines and the tape rarely pulls off any of the base coat of paint when I pull it off.  (For doing this on canvas, I like to use regular masking tape.  Scotch tape and the specialty paint tapes aren't sticky enough for use on canvas.)


Now it's time for LOTS of taping.  Make sure that you accurately follow the margins of the areas that will be one of your colors.  (I painted the marked areas first.) 


Some of the ends of your pieces of tape will overlap into areas that you want to paint.  No worry ... use a craft knife to carefully cut and remove the tape in these spots.


First color ... Scandinavian Pink.  Two light coats.


When the paint is dry to the touch, carefully peel the tape.


I see a little piece of tape that I missed when I was trimming the overlapped parts.  No worry, just touch it up once the tape is removed.


When the first color is completely dry (you can speed up the process with a hair dryer), tape and paint the second color ... in this case, it's Chateau Grey.


Wasn't that easy?


To finish this off, I handpainted the grey outline using ASCP Graphite.  I put some paint into a paper cup, adding a little bit of water so the paint would flow better for a smooth outline.  This part of the process was tedious and stressful.  There's no easy way to hurry it ... I just had to sit there and carefully paint fine lines.  At least I had company while I was working.

Dorothy was trying to get my attention by being completely adorable.


I painted an outline around each section of the compass, and between the Country Grey background and the Old Violet edge of the tabletop.  It took about a half an hour to do this.


Didn't I tell you that it was easy?  So easy that I was crazy enough to do two of them at the same time.


The only part of the process that required any skill or ability was the outline.  Take your time, practice on scraps if you have to.  You can do it!

Next post ... revealing the finished tables.  Tomorrow, I hope.

Wednesday, March 26, 2014

Compass Rose, Two Ways

I mentioned in my post the other day that I have been working on two round tables.  Here they are ... the tops of them, that is.


I have had an itch to paint a compass rose on something.  These tables were out in my stash in the garage.  The table on the right spoke to me, but so did the one on the left ... so I did them both!  Each is a tribute to some of my favorite Annie Sloan colors that we don't see out there very frequently.

The left table is Old Violet, Country Grey, Scandinavian Pink, and Chateau Grey.

The one on the right is a custom mix of Coco and Olive, with Country Grey, Old Violet, and Chateau Grey.

Come back tomorrow and Friday to get all the details and learn how to paint your own compass rose ... it's SO easy!

Monday, March 24, 2014

Is It Spring Yet?

The calendar says that spring arrived last week, but the weather says otherwise.  Winter here was unseasonably cold and snowy.  It takes a close look to find any sign of spring in the garden.  

We can usually count on forsythia being in full bloom by now ... an unmistakable sign that it's time to put winter behind us and begin the spring pruning and clean up in the rose garden.  No forsythia flowers in sight yet.  The buds are there, but they barely show any color.


The roses are generally beginning to put on noticeable growth by now, as they prepare for their late May spring show.  This year, leaf buds are just barely beginning to break on some roses ... they are still tightly closed on others.

'Dr. E. M. Mills' rooted cutting from last year in a pot.


Rosa acicularis, brought home from our trip to Alaska two years ago.  I knew it would be okay in the cold.


Hellebores don't mind winter, no matter how cold and snowy it was.  They appear to be immune to whatever winter dishes out.  They bloom and spread and are a wonderful early season feature in the shady parts of my garden.


This little group of crocus is in the same bed as the Hellebores, but I didn't plant them.  I'm thinking that they were probably brought here and buried by squirrels, who stole them from one of our neighbors.


Finally, we have this single dandelion flower in the grass beside my greenhouse.  Weeds will always find a way.


As far as I can tell, the garden may be as much as a full two weeks behind where I expect it to be.  I am not at all disappointed by this ... it feels as if I have been given a bit of extra time to do what I can to put the roses and the rest of the garden into better shape this year.

According to the weather folks, winter isn't finished with us yet.  It's supposed to snow again tomorrow.

Thursday, March 20, 2014

Did You Miss Me?

Oh, my, has it really been over a week since I checked in?  I have done so much in the past nine days, and done a whole lot of nothing, too ... if that makes sense. Let's dive right in and I will do my best to catch you up with all the fascinating things that have been happening in Hartwood.

Monday morning's view from our dining room window.


When we left off last week, I was head down, working furiously to prepare for the rose volunteer work day at Hollywood Cemetery.  This winter's cold and snow delayed my visits there to evaluate the roses till the very last minute (stressful).  In a matter of two days, I wrote up my notes, updated my rose map, divided the cemetery's roses into ten sections for the ten teams of volunteers, and made assignment sheets for each team ... and I crossed my fingers, hoping that I hadn't forgotten to do something important.

My sweet husband, clearing off my Jeep ... in case we needed to go anywhere (which we didn't)


I needn't have worried because the work day itself went off perfectly.  Twenty volunteers divided into the ten teams made quick work of the pruning and training that the roses required.  We started at 10am, and everyone was finished and on their way home by 3pm.  You will be surprised to hear that I didn't take a single photo that day.  Instead of supervising and photographing, I was a member of the crew with my own set of roses to work on.  I hope to get photos from other people that were there and share them with you soon.

Snow sure is pretty.


On Sunday, The Husband and I went to an event called "Treasures From the Attic", sponsored by our county's historical society.  The object of the event was for residents to bring items for the historians to see, so their stories and images could be recorded and preserved.  We brought the cannon ball that I found while planting roses in the garden back by our barn.  No one could say for sure what weapon it was made for, but they did agree that it probably dated from before than the Civil War.

That's The Husband's Jeep under all that snow.


For the rest of the time, I have been doing things around the house ... you know, important stuff like laundry.  I also am continuing to excavate the hoarder's paradise that I call my sewing room, and I'm making real progress up there.  One day I will show it to you.  Today is not that day.

Our front yard, looking toward the southwest.


I have been bringing pieces of furniture up from the basement and working on them in the dining room.  In the last few days, I have painted and am almost finished with two end tables, two round tables, and a small nightstand.  This clears out space in the basement, but my dining room is trashed from using it as work space, and the living room isn't much better with the finished pieces stored in there.  It feels great, though, to have so many things almost ready to take to the Lucketts Spring Market in May.

Front yard, northwest.


The calendar now says Spring, but the weather for us has been all over the place.  We had beautiful weather and temperatures in the 70s for the Saturday of our workday at Hollywood Cemetery (yay!!!!).  Two days later, on Monday, we had 8 inches of snow on the ground.  Today, the snow is all gone and it is a sunny spring-like day ... but the weather guessers are saying that we have a very good chance of another snow storm early next week.  Temperatures up -- temperatures down.  Snow, rain, sun, fog, wind ... we have had it all this month.

This is our across-the-street neighbor.


Now that the work day at Hollywood Cemetery is behind me, I can now set my sights on continuing the reclamation of my own neglected garden.  Our unusually cold winter has undoubtedly caused considerable damage to my roses, but I'm okay with that.  Any losses provide opportunities.  The cycle of the seasons is something that gardeners have to accept.  This spring, I am excited to get outside and get to work ... staying indoors for most of the winter has been making me nuts!

It's weird having been away from here for so long ... gotta get back into the habit of writing and sharing again.  I missed you guys!!

Tuesday, March 11, 2014

Final Preparations for Rose Work Day at Hollywood Cemetery

This winter has been an unusually cold and snowy one in many parts of the country ... here in Virginia, too.  Because of this, my preseason on-site evaluation of the roses at Hollywood Cemetery has been pushed to the very last minute ... our work day is this Saturday (March 15) and I am scrambling to make sure that I'm prepared.  

I spent all day yesterday (Monday) with Donald, the cemetery's Grounds Foreman, chipping away at the rose list.  We visited and evaluated and tagged 46 roses.  This is in addition to the 49 that The Husband and I did last month.  I feel a lot less stress about this now, since we have made so much progress in such a short amount of time.

I saw this Robin as I was leaving for the day yesterday.  He sat there while I rolled down my car window and snapped this photo with my iPhone.  I guess he was enjoying the sunshine, too.


I am hitting the road again today, for my final day of on site preparations.  There are 30 more roses left on the list to be located and evaluated ... I hope it doesn't take me all day to do this, because there are a couple of junk shops that I'd like to hit on my way home, as well as a quick stop at Trader Joes for stuff.

Wish me luck.

Sunday, March 9, 2014

Meanwhile, a 180 Degree View of the Family Room ...

Don't let my last post about the state of destruction and work-in-progress nature of our living room make you think that that room represents the state of the rest of our house ... far from it.  Most rooms are very close to finished, which is why it took five years of full-time work on the place before we could move in.  (I cannot tell you how much I wish that blogging had been around back then, to keep an in-the-moment record of what I was doing.)  Today, let's move across the hall to the Family Room, and I will show you a more representative view, left to right from the spot where I'm sitting, just like we did in the Living Room.

Immediately to my left, as seen from my seat on the sofa, is a large trunk with a glass top that we use for an end table.  The Lane cedar box holds crochet hooks and other yarn-craft supplies.  The mantel is original to our house, and I stripped off countless layers of paint to reveal its  simple classic details.  The fireplace surround is sandstone.  I bought the Victorian sheep painting at an estate auction many years ago ... that woman who was bidding against me quickly discovered that I was NOT going to let this go and she conceded with only some token opposition.


We have had these red leather chairs forever.  They are uber-comfortable ... Maggie thinks so, too.  The turquoise armoire is an antique in as-found condition.  It holds games and toys and books for our grandkids.  My father-in-law built the ship model and the glass case that holds it.  The paintings of our barn were done by an artist friend of ours.


The TV cabinet used to be our dining hutch.  (The post where I converted it is HERE.)  The staircase is another project that had more going on with it than I could deal with at the time.  All of the fancy pieces, and half of the balusters, are in the basement ... some are ready for primer and paint and others are in various states of stripped and/or sanded to get them ready for paint.  One day I will have it all finished and reassembled.  Right there in front is the top of the coffee table from THIS post.


You see a bit of the weathered blue and green painted finish that I applied to the coffee table ... paint and distressing in THIS post, and application of glaze in THIS one.  That's Ruby's crate, covered with a Pendleton wool blanket that I got at Goodwill for pennies.  The chairs are antiques, bought at an auction exactly as you see them.  They fit perfectly in the bay, along with the pie crust tea table that used to belong to The Husband's grandparents.


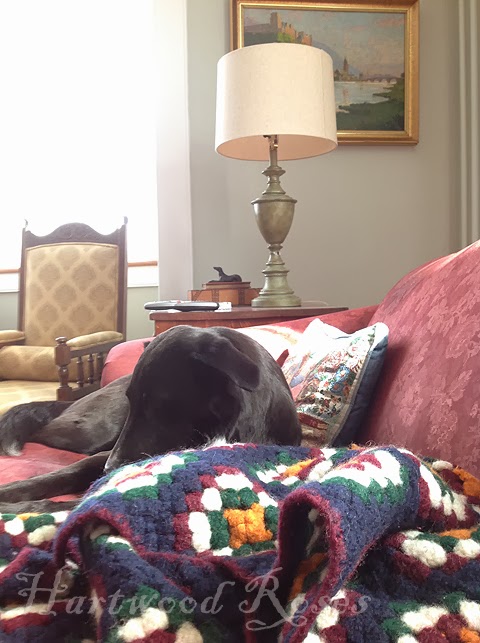
This is the scene immediately to my right ... you see Ruby, and Winnie is under the afghan.  I bought the painting of the Heidelberg Castle on eBay many years ago.  Took it to Antiques Roadshow about ten years ago and Colleene Fesko told us that it is a real live counterfeit, probably painted in the early 20th century, complete with a stamped signature of an artist that I have never heard of.


I hope this little mini tour gives you a good idea of what most of the rooms in our house look like.  Almost everything in them is repaired, restored, painted, etc.  Most people don't notice the nagging unfinished details that I know I still have to deal with ... like installing the moldings in the windows and replacing random pieces of missing baseboard.  All of this will be done in time.  For now, I concentrate most on living here and enjoying it to the fullest ... this is my dream house, after all, and you know the old adage about 'all work and no play ..."

Sunday morning dawned today and it was an hour later than yesterday, which means that we have begun my favorite time of year ... Daylight Saving Time!  With the extra hour of evening sunlight upon us, spring cannot be too far behind.  Bring it on!

Happy Sunday, Everyone!

Thursday, March 6, 2014

An Example of the Graphic Reality of Living in an Old House Renovation

As I sat in the recliner in the corner of our living room the other day, I looked around the room without my usual mental blinders on.  Those of us who have lived in an old house renovation develop an ability to see only part of the picture, like tunnel vision.  I think this is the only way to remain sane and survive in a house that is at all stages of disrepair, demolition, renovated, and nearly finished.  

Our living room is the room that almost held up work on the rest of the house in the early years.  It has the most wrong with it, and was going to require more time and mess and money than any of the other rooms, so The Husband and I made the decision to put off work in there and come back to it later ... when time, money, and emotional energy would permit.  That was some time back in 2004 or 2005.  Because we don't use our living room on a daily basis, things get 'put' in there.  We try to keep it so the room is still at least somewhat usable, though.

(Here's a little bit of background, for those of you who may be unfamiliar with the beginning of our story here.  We bought this house in October 2002.  For five years, I was the general contractor and its renovation was my full time job, until we were finally finished to the point where we could move here in October 2007 ... five full years of commuting 20 miles to work here while living elsewhere, doing most of the work myself, but hiring things like roofing, masonry, plaster, plumbing and floors.)

Now, back to our story ...

Winnie and I sat there, in our corner of the living room, and this was the scene immediately to our left.  The ladder is one that I picked up at an antique shop.  That's the door to our office leaning against the wall ... I took it down because I needed its hinges to reinstall the living room door.  (more on this in a minute)  Notice the two colors of green paint.  The room will eventually be painted the color in the smaller swatch, 'Silver Sage' by Restoration Hardware.


There's so much going on in this next photo!  End table, trunk, sewing cabinet used as end table, old shutters, reproduction pie safe TV cabinet that holds quilts, folk art house, banjo clock, and crib that we are supposed to take to my brother's house ... oh my!


Those are the slipcovers for the sofa cushions that you see tossed over the crib.  I washed them the other day, and I haven't put them back on yet.  That chest that we are using as a coffee table is one of my favorites ... it's all original except for the hinges, including the beautiful original paint.  In the lower right corner, you can see a sliver of a drop-leaf coffee table that I recently finished.  It's going to the Lucketts Spring Market with me in May.  The mirrored hall tree in the bay window is an antique.


The grey hutch is another piece that's destined to go to Lucketts.  Here is the rest of the door story:  There wasn't a door on the doorway to the living room when we bought this house.  We found it later, stored with a bunch of random crap in the loft of our barn ... fortunately, it was still in usable condition.  In order to hang it, I had to  'borrow' the hinges from a door in the office.  The front door and its sidelights and transom have been a big job.  One day I will finish stripping off the last bits of paint and get them sanded and repainted.

What you see in this photo is a good example of the challenges that we have to overcome in this room.  The mottled pinkish color on the walls is the old plaster surface.  I stripped all the paint off the walls as best I could so we could repair them, and this is what I was left with.  Most of the plaster is solid and just needs to be skim coated.  The little bump-out with the light switch had loose plaster on the bottom (which was easy to remove because it fell off), and vinyl spackle elsewhere (which is stuck like glue I can't remove).  The exposed brick that you see shows that all of the walls of our house on this level and in the basement are solid brick ... no lath ... plaster directly applied to brick.


I love the chair in this next photo ... I had it reupholstered years ago, and Maggie promptly set to ruining it by clawing on it.  The painting you see was done by The Husband a couple of years ago, working from a photo that I took of our son-in-law's fire gear on the bumper of a fire truck.  The blue rocking chair is another item that's destined for Lucketts.  The plywood has been leaning against the wall for as long as I can remember.  In front of it is an awesome old radio/phonograph cabinet that I hope to convert into a TV console.

The door leads to the office, but we keep it closed.  On it you can see a peek of the door's original surface ... faux mahogany grain painting that was ruined when a previous owner painted over it with that awful color gold.  I carefully scraped off as much of the gold paint as I could, to preserve the grain painting as an example so I can, perhaps, one day recreate it.


This is the ceiling ... the item that caused the renovation of this room to come to a screeching halt.  The plaster is cracked, and the lath has separated from the framing in places.  We have reattached lath and repaired plaster in an upstairs ceiling, but this one is much more damaged than that one was.  With this one, we have been debating whether to keep the original plaster or remove it.  We installed the wiring and recessed lights with the idea that we were going to keep the ceiling.  After further consideration, and a lot of head scratching and soul searching, we now think that we will probably remove it.  I'm not sure that we can safely reattach the lath (loose plaster ceilings are heavy and can be dangerous), and removing the ceiling gives us the opportunity to hide the wiring in the ceiling itself (instead of tucking it behind crown molding... which this room is not supposed to have) and to install a chandelier.


This final photo is the view from the recliner as I looked straight up.  The gold shelf you see is part of a bookcase that was added by a previous owner, who removed the wall and borrowed space from the closet in the office to do it.  We have gone round and round, trying to decide whether to restore the bookcase or to remove it and return to the original configuration of a wall and a deeper closet.  As of now, we are leaning toward removing what's left of the bookcase and building a new, nicer one in its place.


It's this time of year, as we get toward the end of being cooped up in the house all winter, that gets my mind wandering and I scheme and dream about various projects that we have left in this place.  The living room, with so many things in there to do, is a project that we will continue to put off.  I figured that I would share it with you, to give a real-life view into what DIY old house renovation is REALLY like.

Wednesday, March 5, 2014

A Snuggly Afternoon

I have a cold.  It hit me on Tuesday morning.  Fortunately, it's not a bad cold ... I thought that it was allergies at first.  I had planned to spend the day clearing out the Hoarder's Paradise that is my sewing room, and I went ahead and got a good start on it.  By lunchtime, though, I was getting tired and I realized that I needed to be a good girl and take a break and chill.  Chilling is not something that I do well, as you probably have already suspected.

With all of my 'chilling' supplies gathered, quilt, iPad, tissue box, and glass of water, Winnie and I settled into the recliner in the living room beside the radiator.

You can't see her, but there's a Chihuahua snoring quietly under that flap of quilt in my lap.


There we sat, Winnie and me, snuggled under the quilt.  She snored and I read.  It felt good to sit and do nothing ... unless you count blowing my nose as something ... I did a lot of that.

At one point, Winnie (and Ruby) alerted to something that I couldn't hear.  Fed Ex was dropping a package on the porch.  The driver didn't knock, and I didn't get up ... and the dogs barked and barked at the 'intruder'.

bark  bark  bark


Big barks from Ruby ... little barks from Winnie.  Ruby did her barking in the foyer by the front door ... Winnie was still in my lap.  Bark, bark, bark, until they realized that they had successfully chased the intruder away.  Then a couple more barks for good measure.

Is he gone yet, Ruby?


Then everyone settled back into what they had been doing ... Ruby asleep in her spot on the family room sofa, and Winnie under the quilt in my lap ... and I continued to read until dinnertime.

Related Posts with Thumbnails