
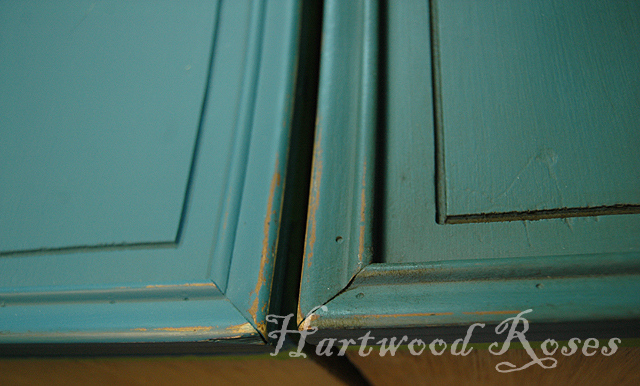
As promised, here are some tips for you ... illustrated with photos of the steps that went into waxing Big Blue. My goal with this piece was to produce a finish that looked like a genuine, aged old paint patina. Annie Sloan Chalk Paint, in 'Aubusson Blue' in this case, along with clear and dark wax, are the perfect materials for doing this.
Here are close-ups of two drawers ... the one on the left is painted and distressed, with no wax yet. On the left is a finished drawer. See how the dark wax brings out the details?
Annie Sloan stockists sell beautiful wax brushes ... but I don't have any of them ... yet. I use a natural bristle chip brush to apply my waxes.

The goal is to apply as little wax as possible, and to rub it INTO the paint ... not have it laying on top. (You can tell you're using too much wax if it makes gummy boogers while you're rubbing it in.) I dip the brush into the clear wax, picking up a LITTLE bit of wax, and I rub the brush in circles on the paint until the surface looks evenly 'greasy'. The photo below shows an area that needs more rubbing ... not necessarily more wax.

The area on the left side of this drawer below is what it looks like when the wax is adequately rubbed into the paint.

I then rub off as much wax as I can with a clean cloth.

At this point, before the clear wax has a chance to set up, I begin to apply the dark wax. A little dab goes a LONG way. With the drawers on Big Blue, I started by using a brush to rub a light coating of dark wax into the groove on the panel of the drawer front. (remember ... one brush for clear wax, another brush for dark)

I used a cloth to quickly spread the wax into the corners and wipe off any excess.

When the groove and edges of the panel were to my liking, I turned my attention to the center. Working quickly, I used my brush to spread a small amount of wax evenly on the drawer.

I immediately grab my cloth and spread the dark wax onto the drawer in a circular motion, finishing with long horizontal strokes to wipe off excess wax ... until I got just the result I was looking for.

The beauty of this process is that it is almost completely adjustable. You can wax as dark or as light as you want ... and you can remove some of the dark wax with clear wax if you need to start over.
This is what the center of the drawer looked like when I finished it. See the difference between the waxed center of the drawer and the still-to-do molding on the edge? I love how rich 'Aubusson Blue' looks with a good coat of dark wax!

Sometimes I want to accentuate a corner or contour, so I put a dab of wax on my cloth and carefully work it in with light strokes.
Once the wax is dry (I usually leave it overnight), use a clean cloth and buff the surface till you get a nice even shine.

Here's one of my best tips ... Don't be tempted, especially on a large piece like Big Blue, to wax the whole piece with clear wax THEN go back to apply the dark. Do one small area at a time, like one drawer or one side of the piece, and you will have more control.

I cannot overstate how much I love the look and feel of a hand-rubbed wax finish on painted furniture! I am an extremely tactile person, and the silky surfaces are REALLY nice. (My #1 rule: If a piece is not silky and smooth, it doesn't leave my workshop ... period.)
I hope this demonstration will help you achieve a beautiful wax finish on YOUR projects. Let me know if you have any questions.


