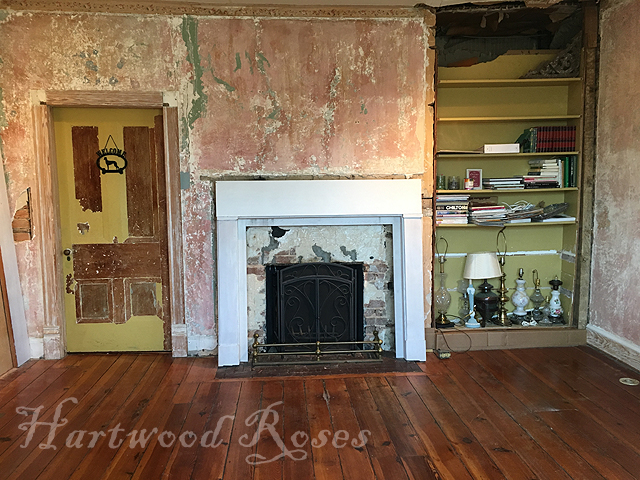
We decided a long time ago that it would be better to remove the ceiling in our living room, instead of trying to repair it. It had extensive water damage, and large portions of the plaster had separated from the lath. When our plasterer remedied a similar situation in our guest bedroom, he used screws and plaster washers to resecure the detached plaster, then he taped and skimmed over his repair and made it disappear. The living room ceiling had an additional complication which made it less of a candidate for the plaster washer repair. Over the years, debris had collected in the space between the large sections of loose plaster and the lath where it was formerly attached, which prevented us from reestablishing a good connection using the screws.
It took a long time for me to get comfortable with this. Throughout our renovation of this house, I have done whatever I can to preserve original elements. I respect the history here, and I want to keep as much of it as possible. In order to move forward with the work in the living room, I had to grit my teeth and admit that this ceiling, though largely original, had to go.
First, we had to remove everything from the room ... and we stashed stuff wherever we could throughout the house.
Rug, console, and a pile of trunks in our foyer.
Sofa, Maggie's favorite wing chair, and disassembled recliner in the dining room.
Once the room was empty, we laid paper to protect the floor.
This paper was previously used during ceiling repairs upstairs ... reuse and recycle!
Plaster removal itself was done carefully ... using a 5-in-one tool and a hammer to chip off manageable pieces, which were dropped into buckets. I'm no fan of sledgehammer demolition, because it creates a huge mess, causes unnecessary destruction, and would most certainly damage the floor as the heavy debris falls.
See the bit of brown horsehair in the one chunk of plaster?
Slow, steady progress.
The strip of something that you see on the wall below the ceiling is a wallpaper border that had been hidden behind crown molding. The crown molding also hid a strip of wallpaper on the ceiling. The wallpaper is not an 1840s original, but it does look old. This room has been updated a number of times, most notably in the 1930s, and the wallpaper may have been installed during that remodel.
The ceiling paper has a slight sheen.
From a distance, it looks vaguely like an all-over floral ...
... though I can't make out a true pattern to it.
Plaster removal took 2-1/2 days. Plaster is heavy, and working overhead like this is very tiring.
There was an insane amount of sand and brick dust in the ceiling above the fireplace.
Plaster ... all gone.
Originally, we planned to leave the lath in place and drywall over it. With the plaster gone, we could see that the lath wasn't even enough for us to do this ... and there was a LOT of stuff in some of the joist spaces above it. Just like with the plaster, the lath had to come down ... carefully.
It was really exciting to reveal the original ceiling joists. The ones that appear to be short are extensions of the the joists of the adjacent foyer.
Once the lath was down, we sifted through the debris on the floor as we swept it up, to make sure that there weren't any hidden treasures. What did we find?
A vintage rat nest ...
... which contained lots of fabric scraps ... none of which was modern, thank goodness.
Two rat mummies.
Walnuts, a corn cob, mud dauber nests, and some leaves from the Post Oak tree beside the house.
Pieces of glass, some newspaper shards, and a few old nails.
Three of the pieces of glass fit together, and they appear to be part of a pressed glass footed compote.
We pulled the nails out of each piece of lath, sorted them by size, and bundled them for easier storage. I hope to give it to someone who has a need for 19th century sawn lath.
I am always in awe of the craftsmanship of the framework of this house!
There are cross beams beside the chimney, which support fireplaces on the upper floor.
The cross beams are connected to the floor joists with pegged mortise-and-tenon joints.
With the plaster and lath removed, and the mess cleaned up, this part of the living room renovation is finished.
It will be a while till we work in this room anymore. We have to rerun the wires for the recessed lights, add new wire and a switch for a chandelier, decide what to do with the bookcase space, etc., etc., etc. In true old-house tunnel-vision fashion, we put the furniture back into the room and we will use it as is ... till we get the energy, motivation, and inspiration to keep working to make it beautiful again.


