This week, let's put baseboard in the Basement Bathroom ... and I'll show you step-by-step how to do it. By the time we finish here, you'll know how to do a Butt Joint, a Miter Joint, a Coped Joint, and a Return.
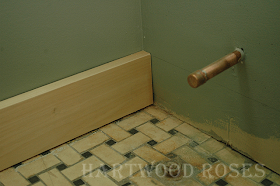
For this bathroom, to keep with the vintage feel of the design (and the vintage nature of the whole house) I decided to use a painted two-piece base, with a natural wood shoe molding. The supplies I needed were: 1 x 4 poplar, base-cap molding, and oak shoe molding ... all of this is available at any lumberyard.
The poplar boards go on first. They meet at the corners with a Butt Joint. This is just a 90 degree straight cut ... the easiest there is.
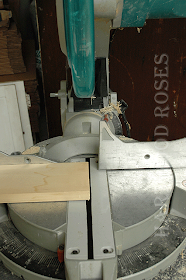
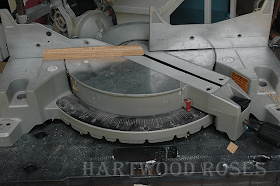
Set the miter saw to 0, and cut the board.
Board #1 in place.
Board #2, cut the same way, butts right up against it. (I'll even up the two pieces when I nail them to the wall.)
Step One ... Finished.
The walls in this old house are really wavy in places. The base cap molding will hide this gap and make everything look nice and straight.
Since I'm painting the molding, and I will be caulking all the joints, I decided to use Miter Joints on the Base Cap. The saw is set at 45 degrees ... one-half of a 90-degree inside corner.
What a nice clean cut!
Piece #1, in place.
Turn the saw to 45 degrees the other way to cut the second piece.
Piece #2 in place. See how this covers the Butt Joint, and makes everything look finished.
I had to do something a little bit unconventional make the base cap fit around the radiator pipe.
What to do?
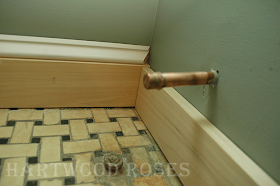
I decided to make a notch in the molding to fit around the pipe.
It needs something on top of the pipe now.
I made the little filler piece using the miter saw to cut the angles, and the coping saw for the semi-circle. Once it's caulked and painted (and hidden behind the radiator), it'll look great.
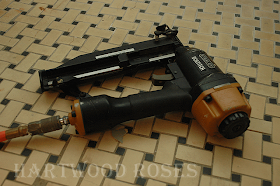
To attach the moldings to the wall, I used my pneumatic finish nailer loaded with 2 1/2" 16-gauge finish nails. Make sure you are nailing into the wall studs!
I use wood filler to fill the nail holes. This one is handy for the small holes in a job like this, because you can squeeze the filler directly into the hole, and smoosh it in with your finger.
Over-fill the holes just a little bit, so they're nice and level once they're dry and sanded.
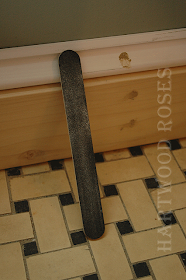
My favorite tool for sanding small holes like this is a regular old emery board. Knock off the majority of the excess filler with the coarse side, and finish up with the fine grit.
Apply one coat of primer, lightly sand everything with a fine sand paper after the primer dries, and caulk all the joints. After the caulk dries, apply two coats of your choice of finish paint. I'm using Valspar Cottage White, in semi-gloss ... I haven't done this part yet. I'll skip to the next step and pretend I've painted, just to keep this post moving.
Shoe molding provides the perfect finishing touch! I chose oak molding, and pre-finished it with two coats of satin polyurethane. Since I can't use caulk on the natural wood to hide any potential bad joints, I make a Coped Joint for shoe molding.
I cut the piece for the first side of the corner the same way I did the butt joint. The second piece for this corner is going to be cut and shaped to fit over the first piece.
On the second piece, cut a 45-degree angle to expose the contour on the front side of the molding.
Trace the edge of the contour with a pencil, so it shows up better.
Clamp the molding firmly to your bench ... I love these quick clamps and I use them all the time.
Use a coping saw to cut along the pencil line, angling the blade to make a slight back cut. If you start your cut on the skinniest part of the molding like I did, you have less chance of breaking it as you saw.
The curved cut on this second piece ...
... should fit right over the first piece, making a perfect joint. If it doesn't, you can fine-tune the cut with sandpaper or a rasp until it fits.
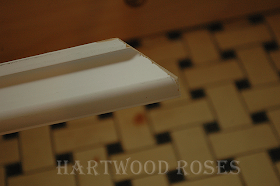
Instead of leaving a raw, cut end where the shoe molding meets doorway openings, I like to do a Return to finish the ends. This is simple to do, and it makes your molding (any type of molding, not just shoe molding) look SO professional.
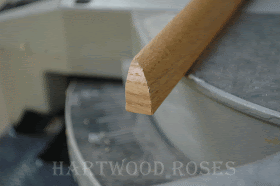
With your miter saw set at 45 degrees, cut your molding as shown ... so the miter points toward the back side of the molding.
Like this.
Turn your saw to 45 degrees the other direction, and cut a corresponding angle on a scrap piece of molding.
The object here is to cut the angled part off of the scrap piece, to create a teeny little wedge to fill the angle in the back of the first piece. I like to do this with my coping saw, because the miter saw tends to grab little pieces like this and throw them across the shop.
Here's the piece.
Use whatever glue you have on hand, to glue the two pieces together. I use a piece of tape to hold them until the glue sets.
Doesn't this look nice? After I paint the baseboard, I'll use my nail gun to attach the shoe molding to the baseboard.
Done!!
* * * * * * * * * * * * * * * * * * * * * * * * * * * * * * * * * * * * * * * *
I'd love to hear if you have any suggestions for where this series should go. Do you have any projects or techniques that you'd like to see demonstrated? Leave a comment here, or send me an email, and I'll see what I can do.
I've been doing carpentry, trim, and most types of building and remodeling since I was in my early 20's (and I'm WAY past there now), and I've figured out easier ways to do LOTS of seemingly-complicated projects.
(written by Hartwood Roses. Hartwood Roses blog.)

